本文简介windows系统 MySQL8.0安装步骤,使用MSI Installer安装包方式安装。这种安装方式比较简单,都是图形化界面,一步步安装就OK了。
1、下载MySQL
1.1、到MySQL官网下载下载MySQL8.0。
下载地址:https://dev.mysql.com/downloads/mysql/
打开网页后,点击 “Go to Download Page” 链接,如下图: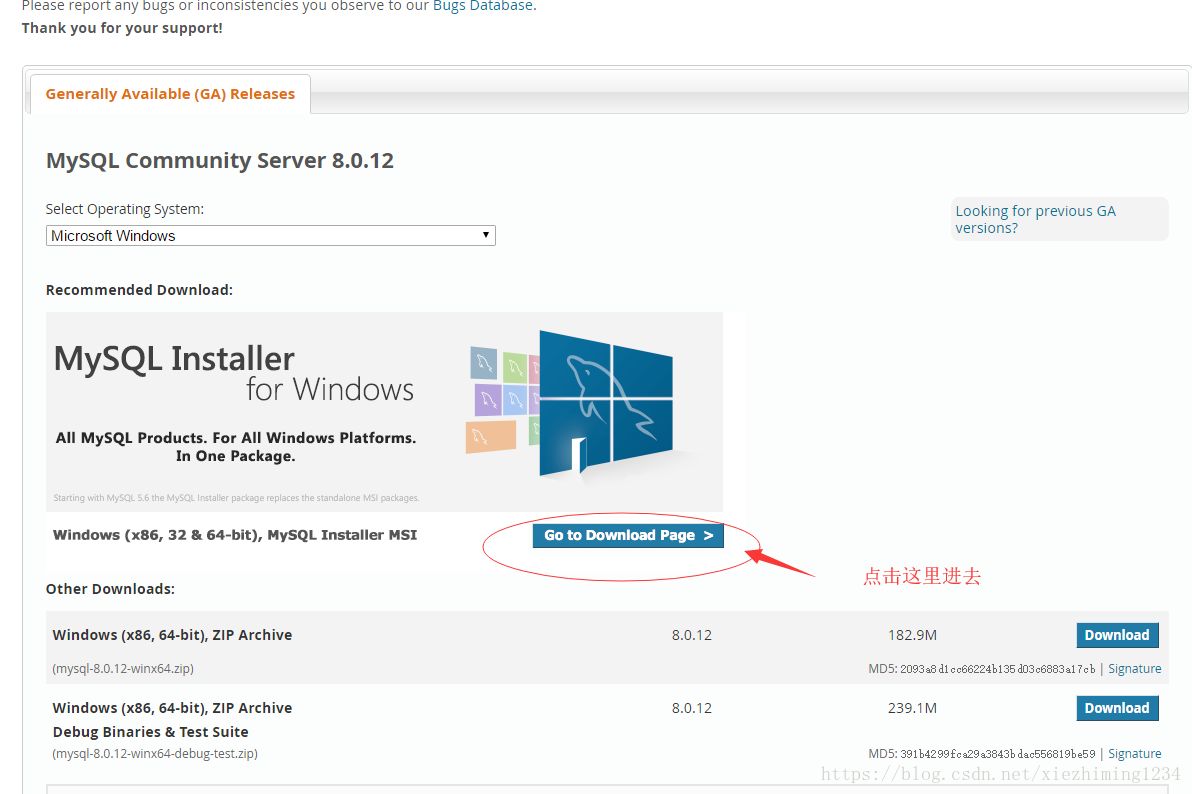
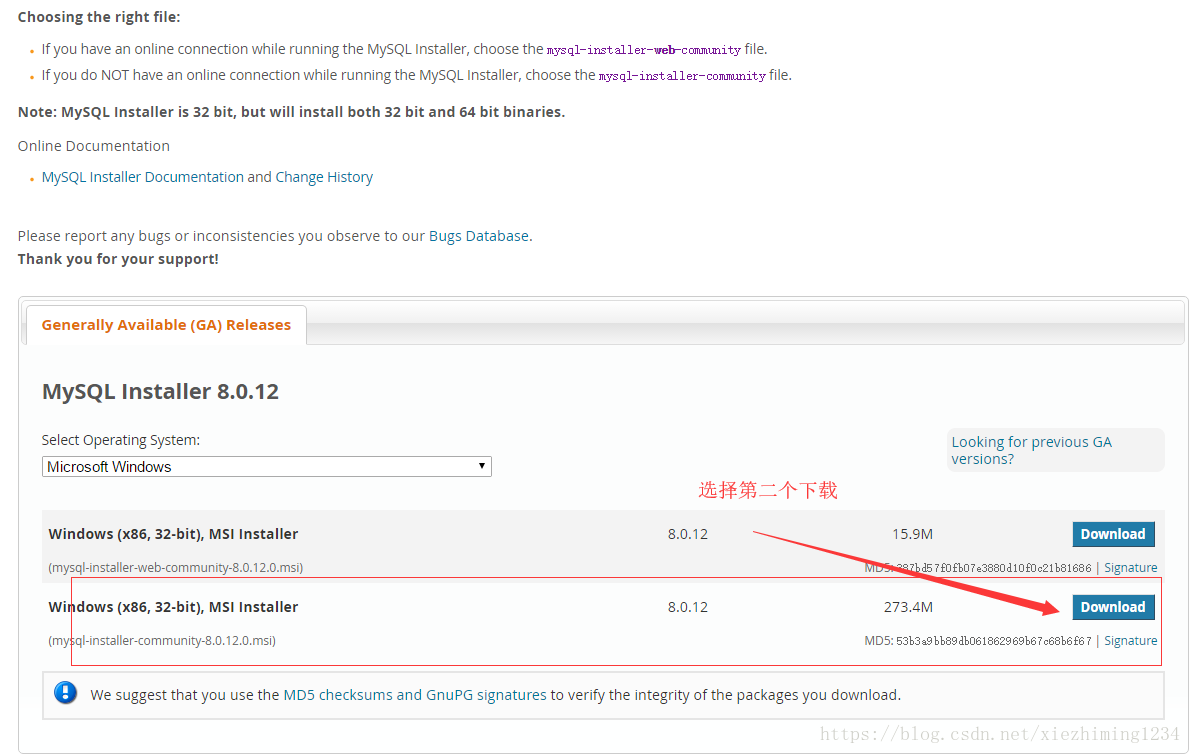
1.2、然后选择第二个 “Windows (x86, 32-bit), MSI Installer” ,点击 “download”
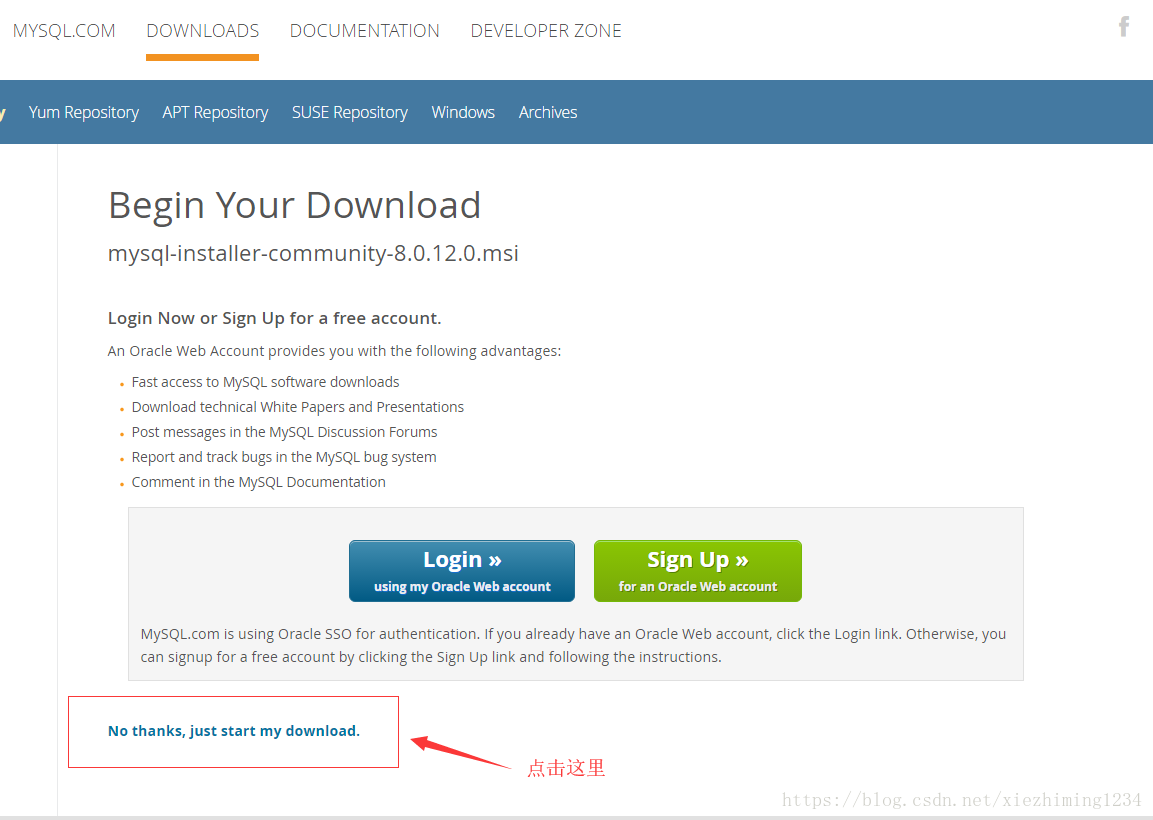
1.3、点击 “No thanks, just start my download.” 如下图
2、进行安装
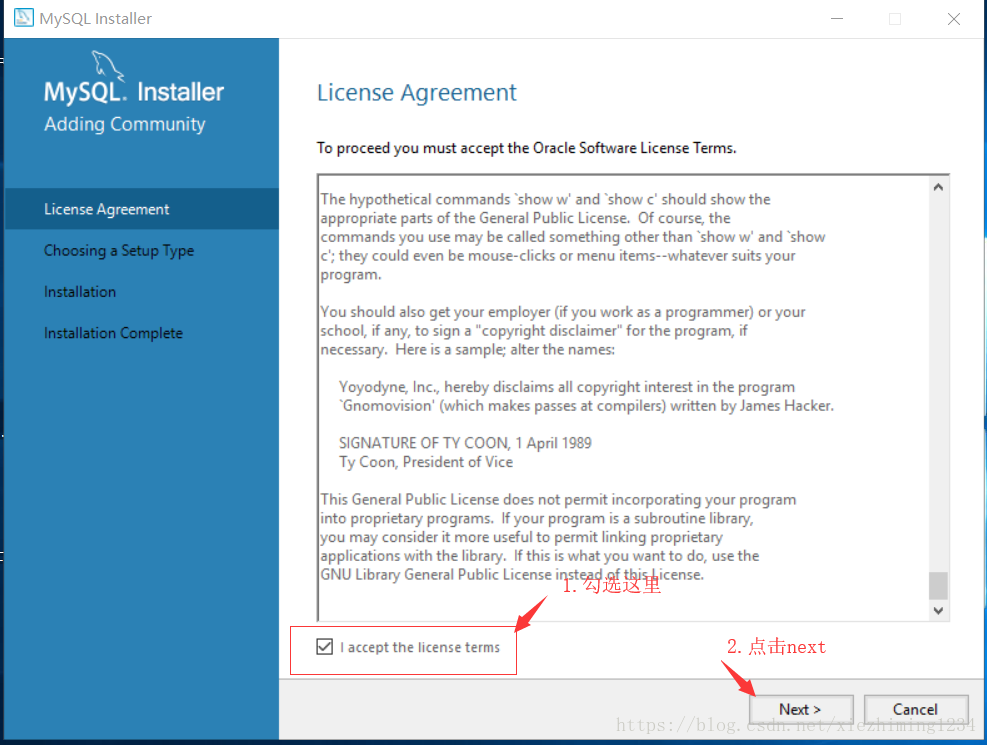
2.1、下载后,进行安装,进入license agreement界面,勾选 “I accept the license terms” ,然后点击 “next”
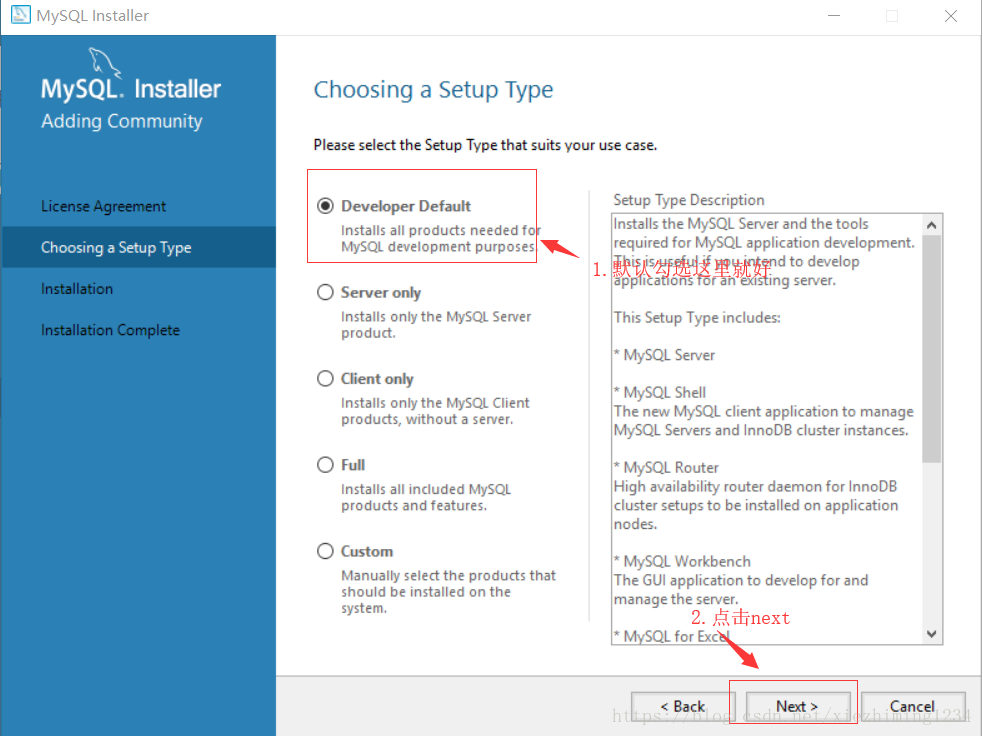
2.2、choosing a setup type界面默认勾选 “developer default” ,然后点击 “next”
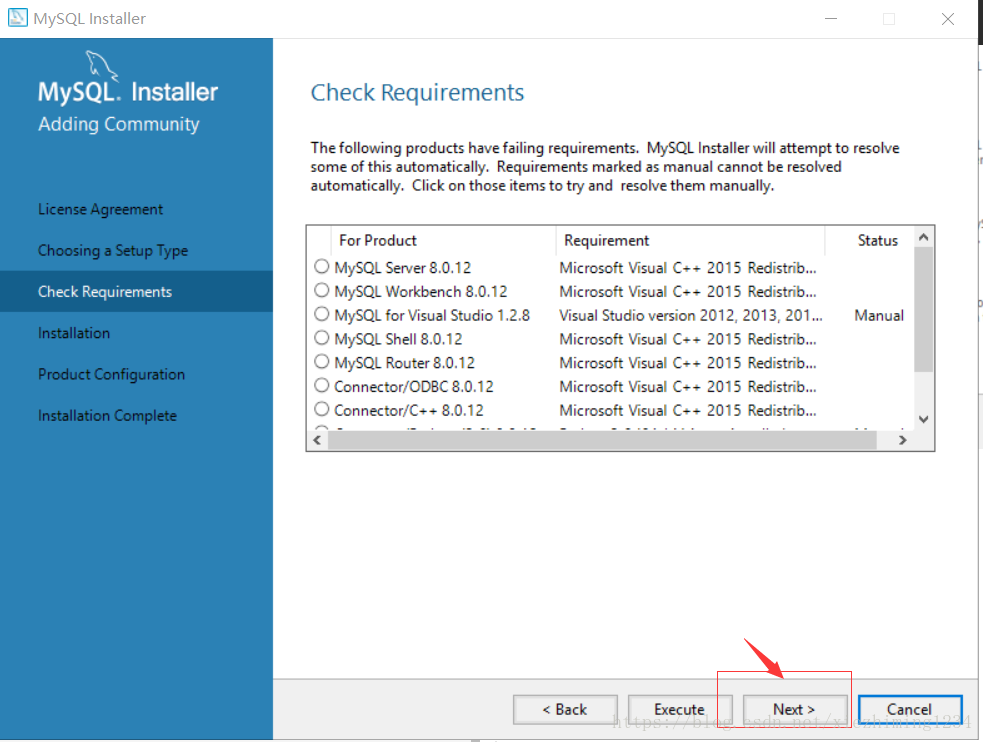
2.3、check requirements界面,先点击execute,再点击 “next”
2.4、弹出的提示框选择 “yes”

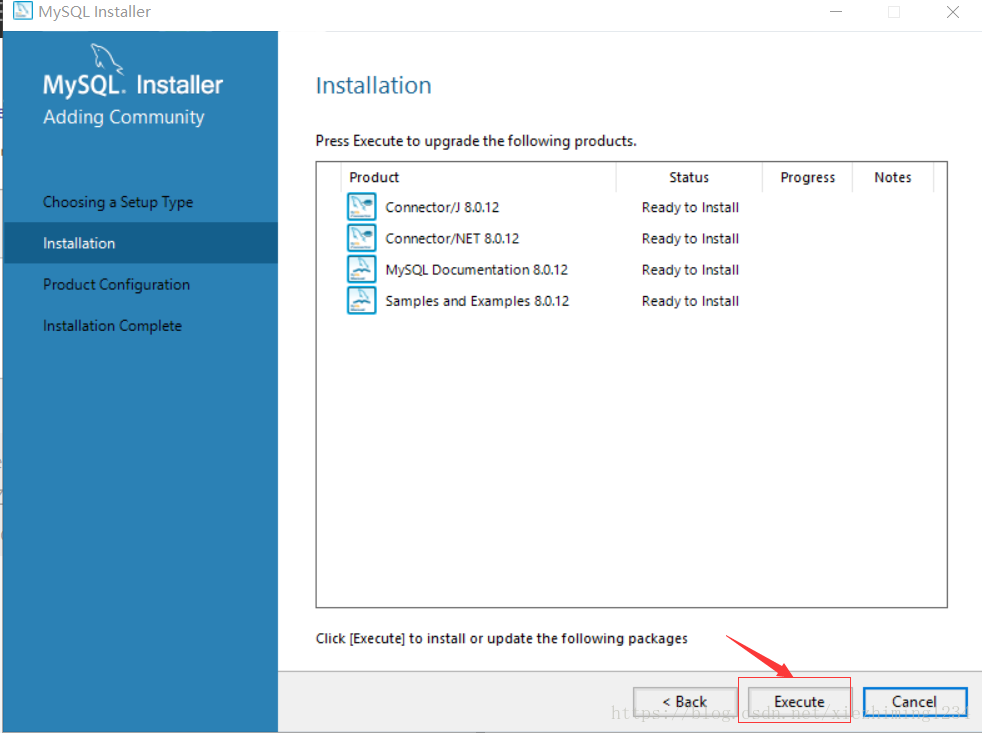
2.5、installion界面,点击 “execute” ,完成后,点击next
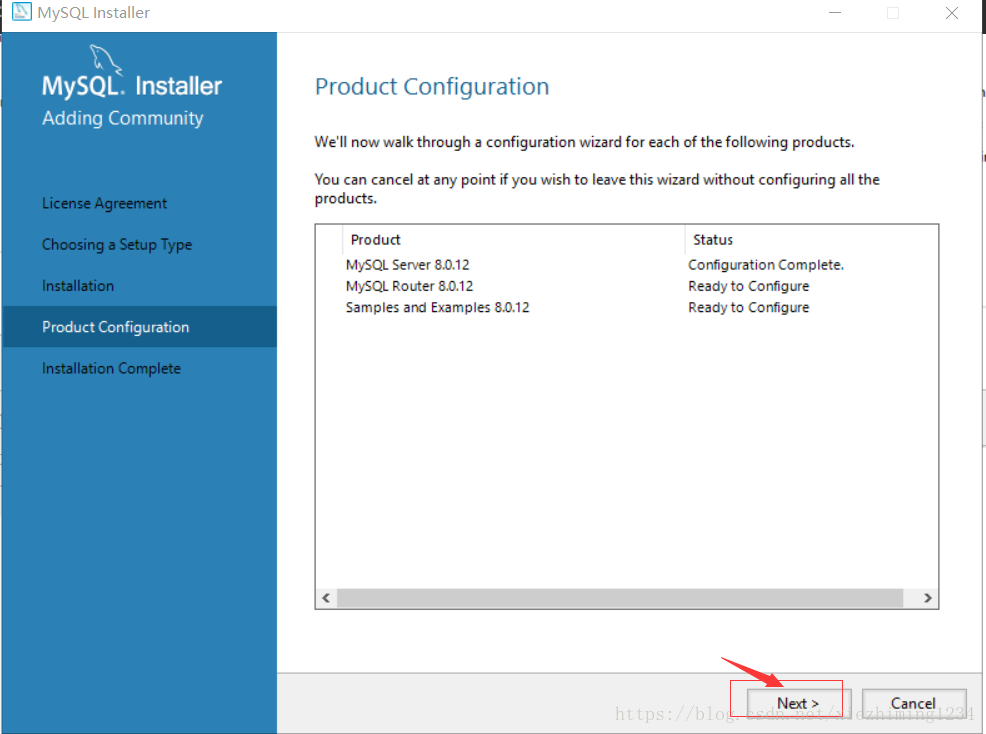
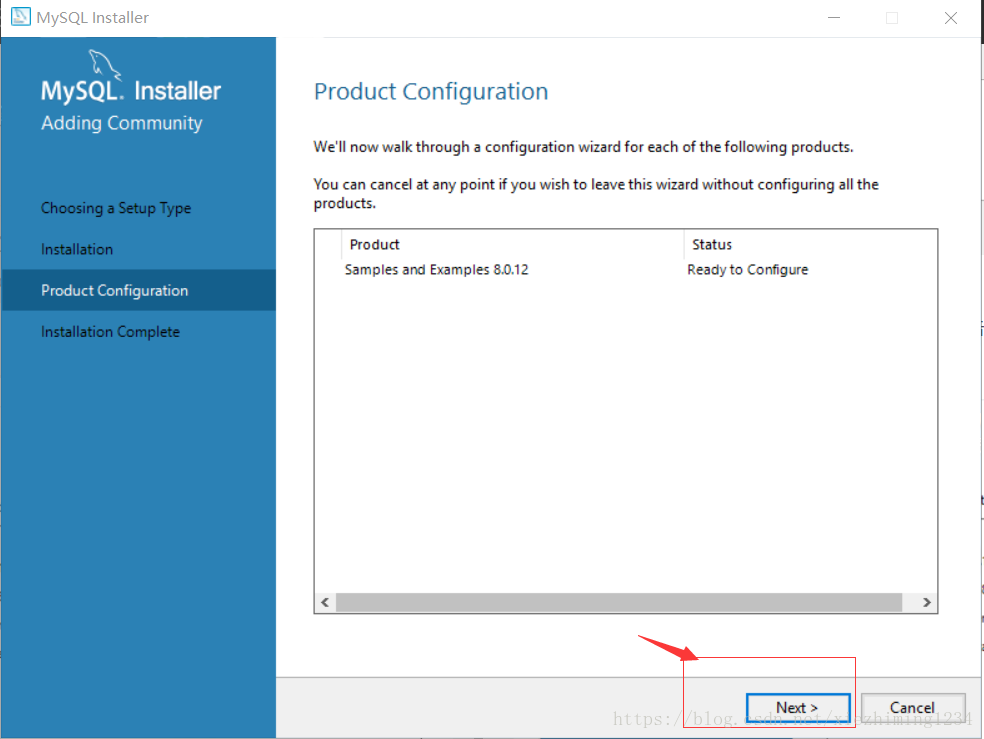
2.6、product configuration界面点击 “next”
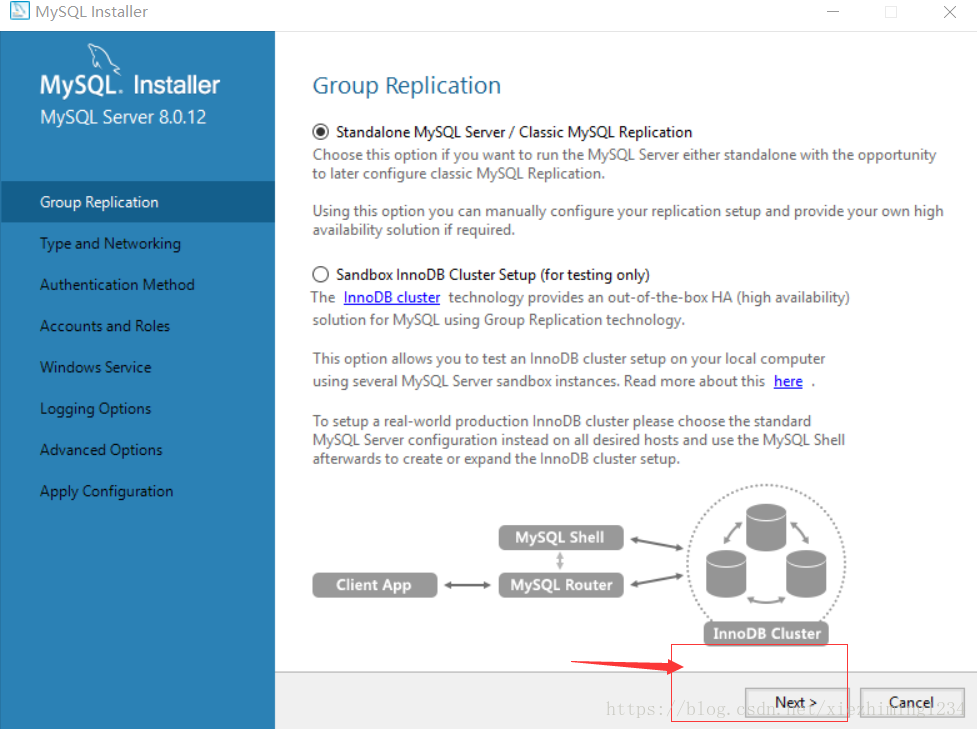
2.7、group replication界面点击 “next”
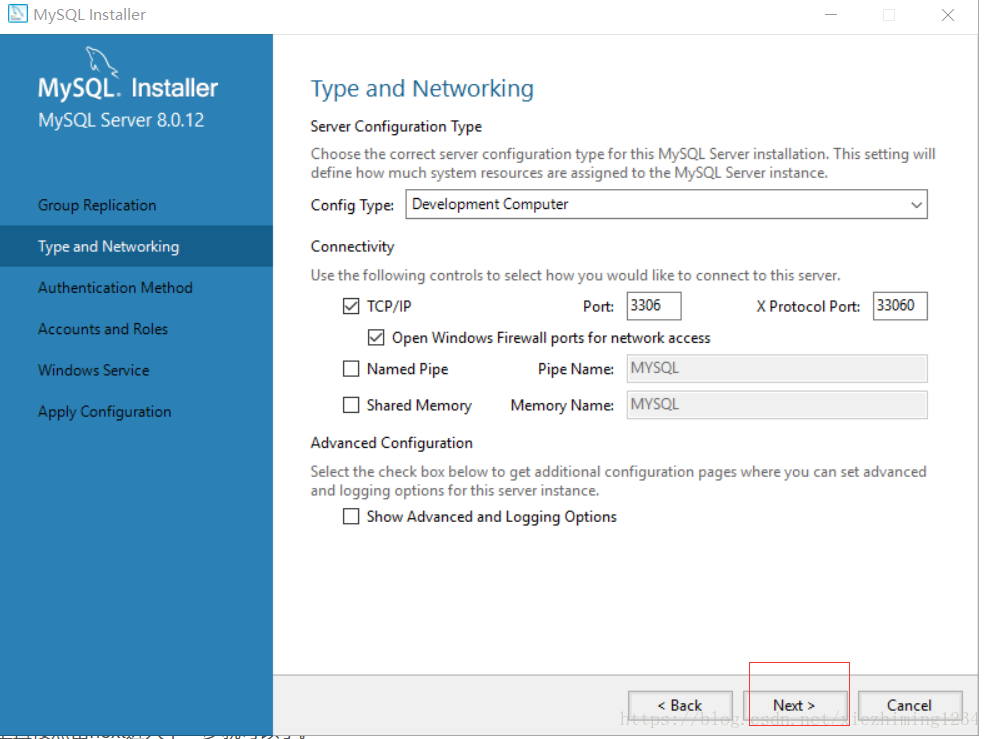
2.8、type and networkig界面点击 “next”
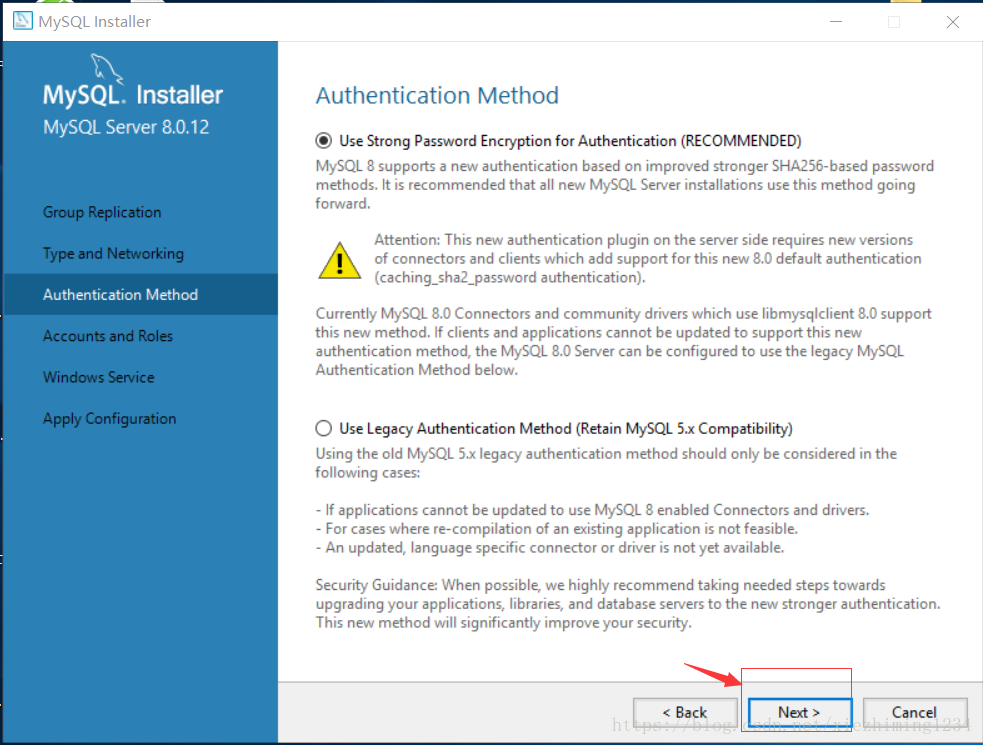
2.9、authentication method界面点击 “next”
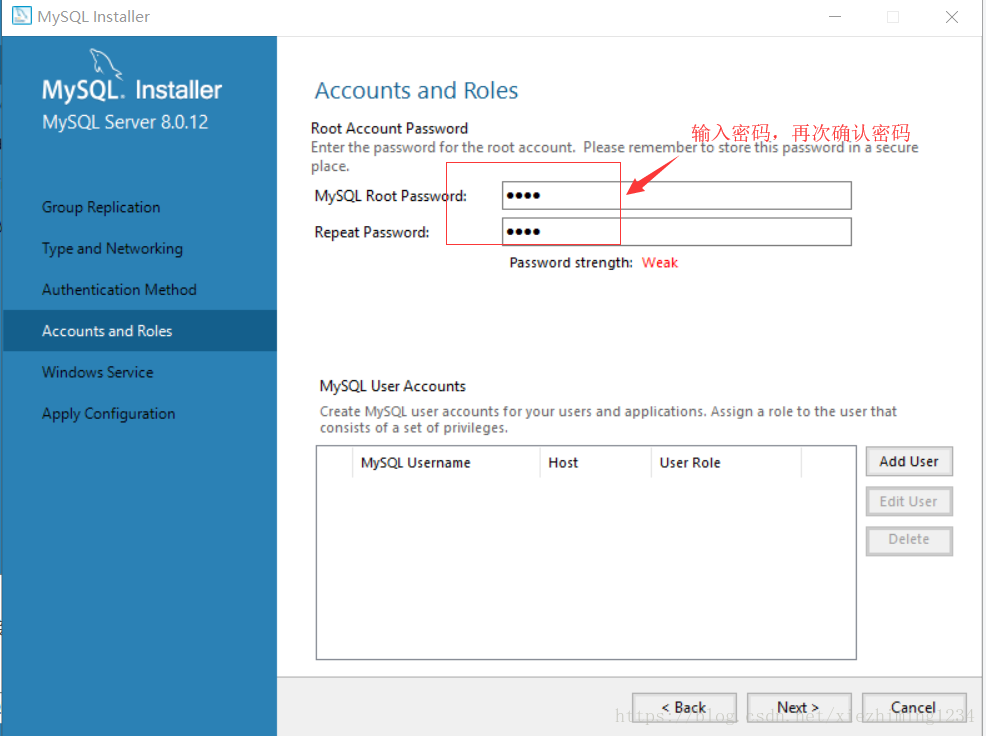
2.10、accounts and roles界面,输入密码并再次确认
2.11、windows services界面,点击 “next”

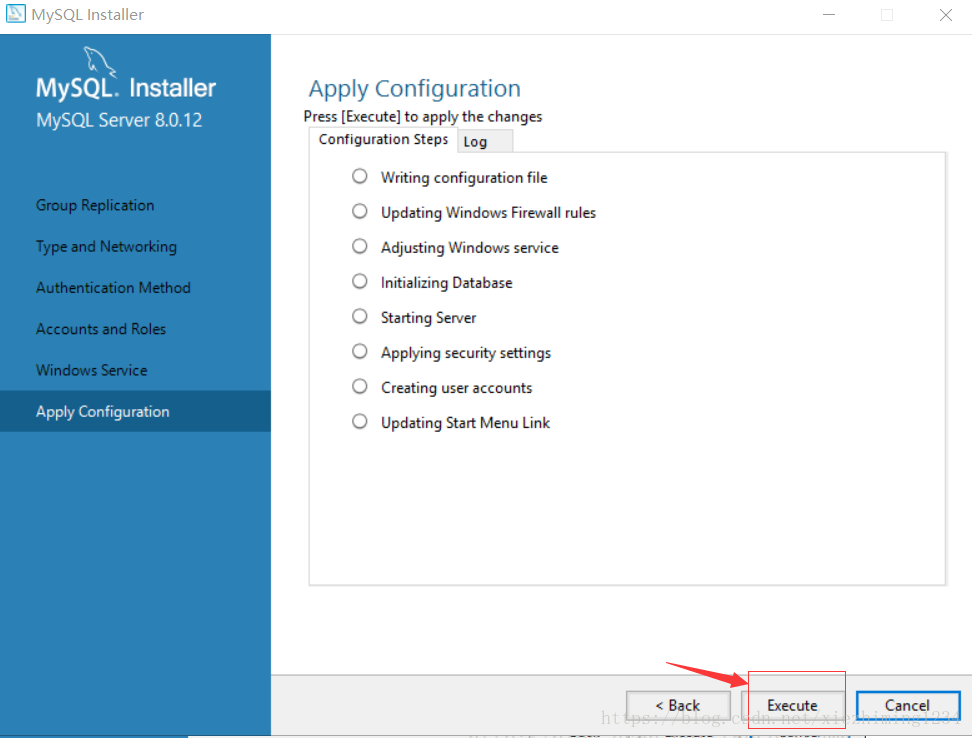
2.12、apply configuration界面,点击execute,然后点击finish
2.13、product configuration界面,点击next